A simple guide to recording your USB microphone in social audio apps
With all the buzz around social audio apps like Clubhouse and Twitter Spaces, there’s a lot of people looking to improve their audio quality on iOS. But if you’re not a professional podcaster, introducing XLR cables and audio interfaces to your setup might be a bridge too far. If you’re just starting out and want as little fussy hardware as possible, this guide is for you.
Getting Started
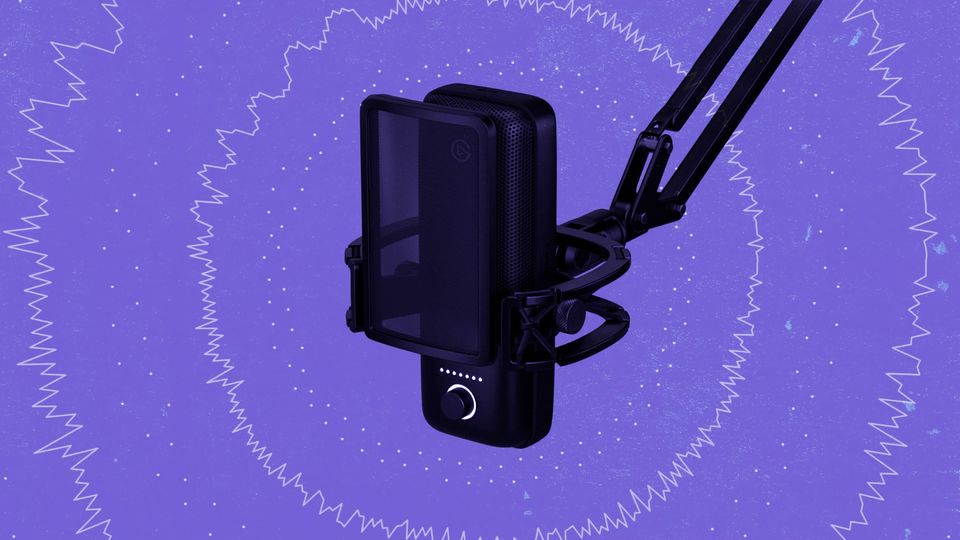
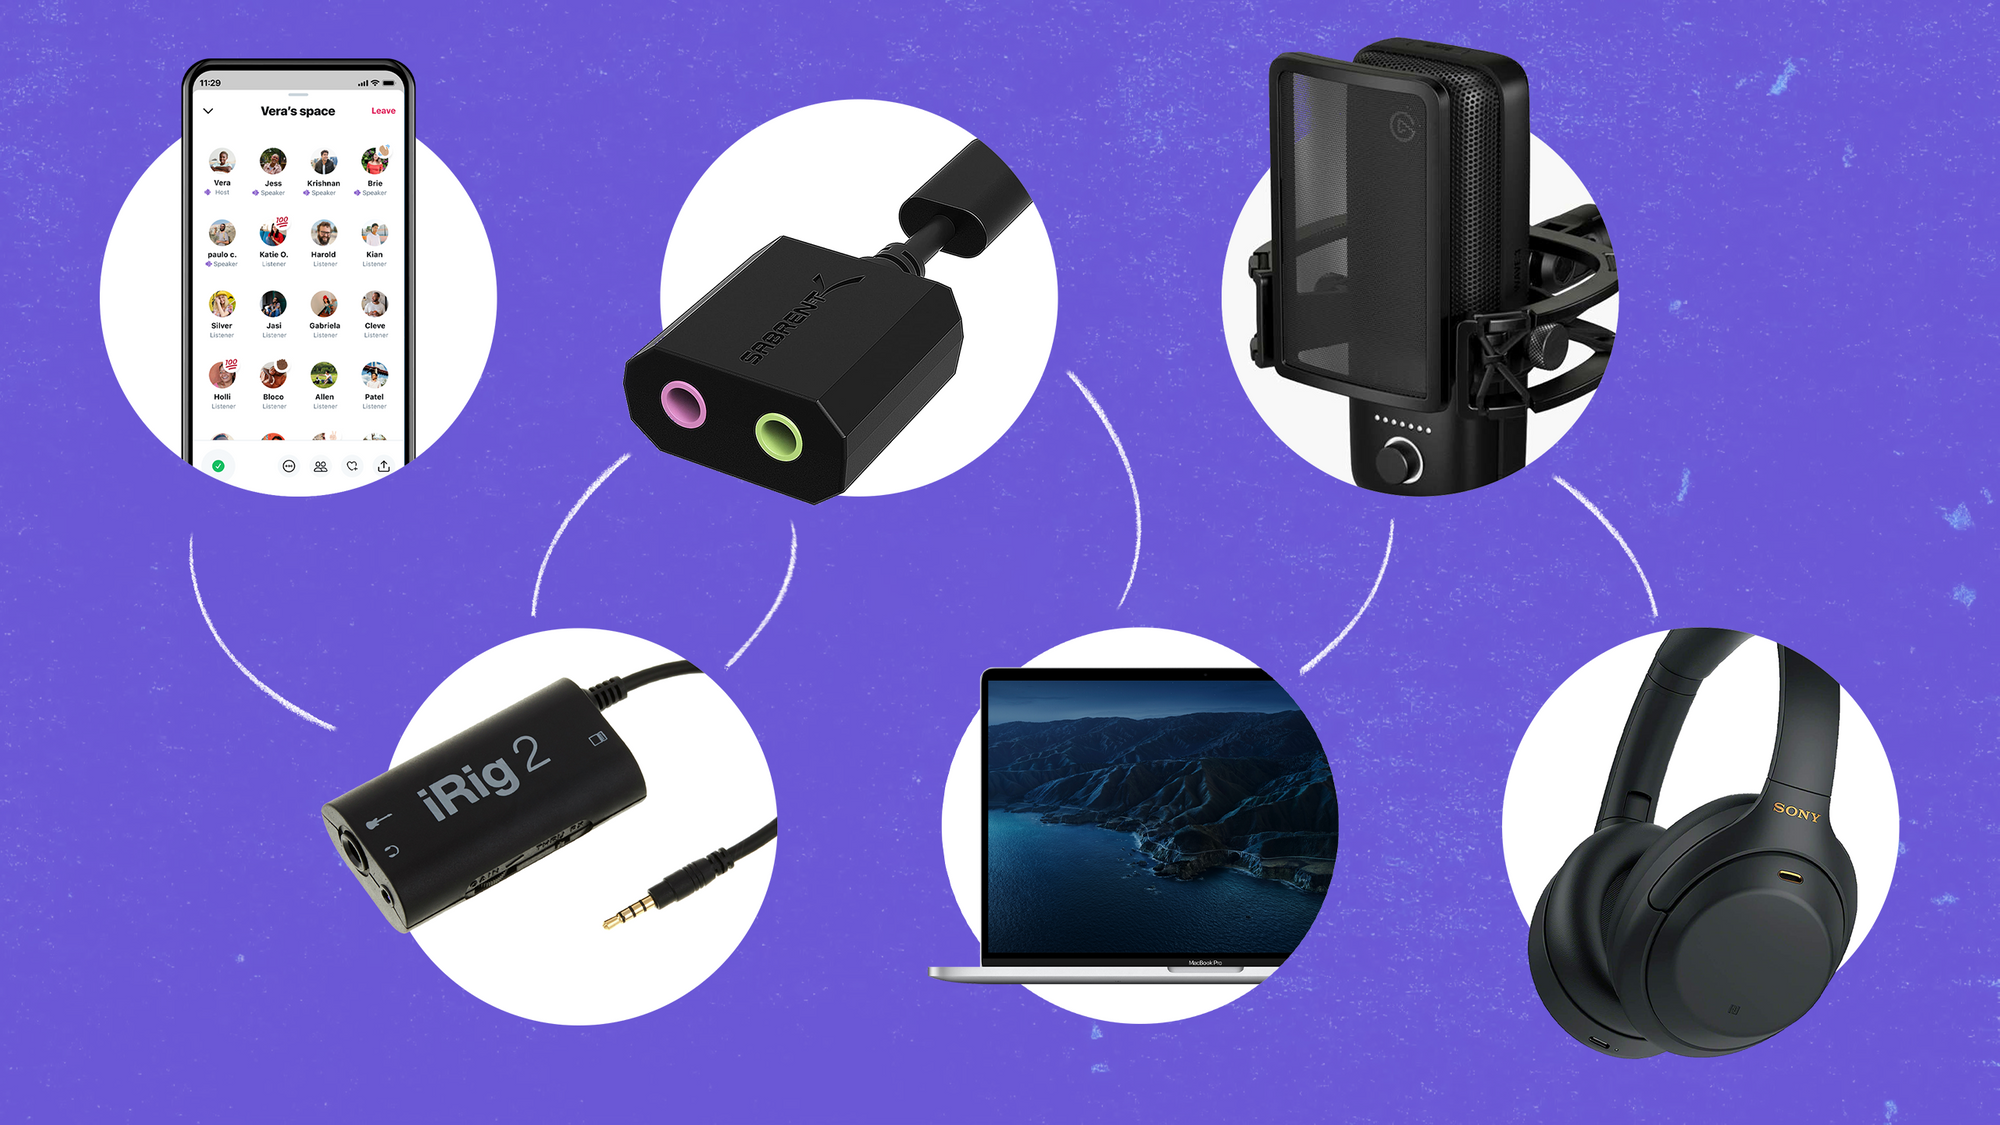
Before we jump in, there’s a few pre-requisites. You’ll need an iOS device, a Mac, a pair of headphones, and a USB microphone. I already owned an Elgato Wave:3 and a pair of Sony Noise-Canceling Headphones, but any USB mic and headphones will do.
Hardware
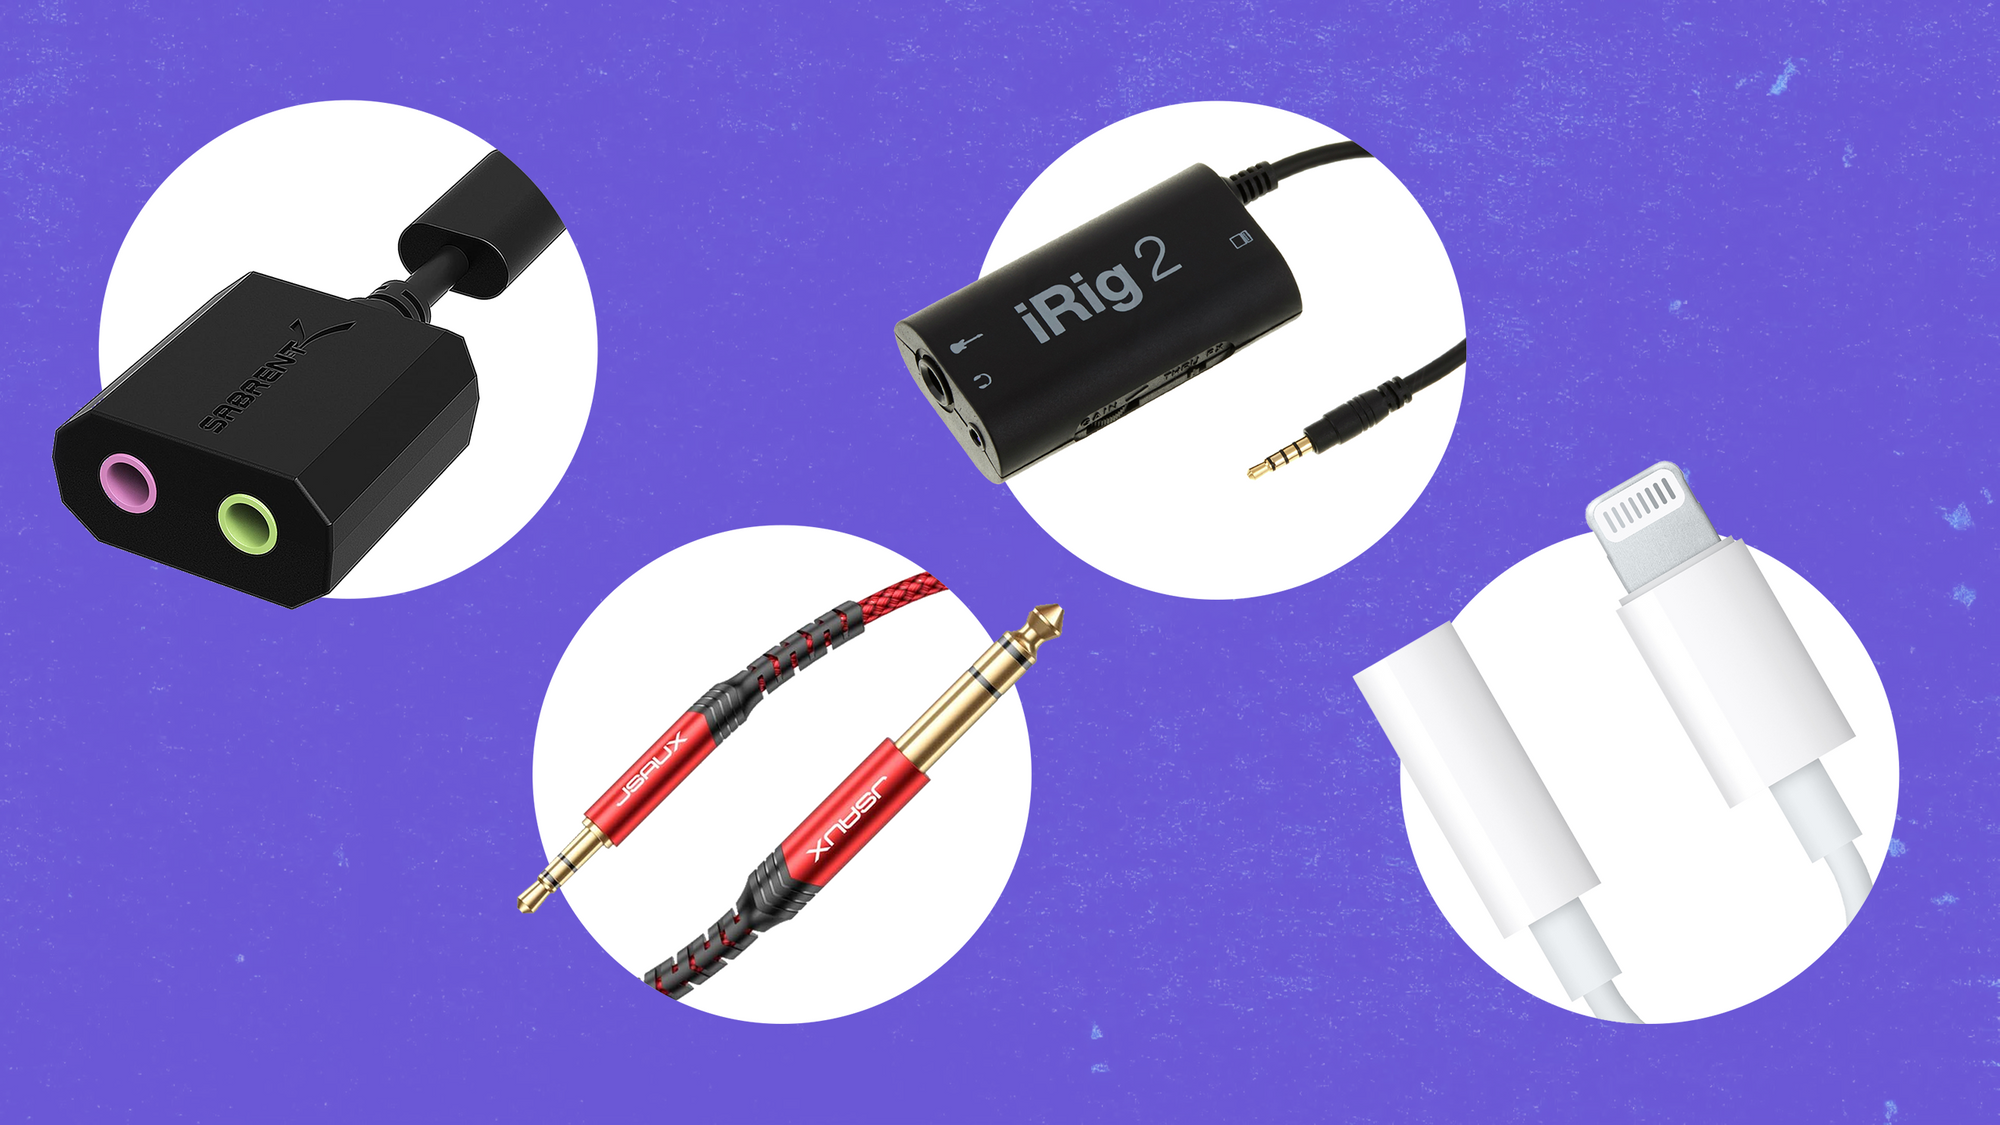
The tricky part of this adventure was learning that iOS treats conversations and solo recording differently. Buying a mic with a Lightning jack like the Shure MV88 might sound better in the Voice Notes app, but if the iOS app doesn’t give you control to select a microphone, then chances are that a live audience is just hearing your device’s default microphone. The simplest solution involves a few more gadgets. You’ll need the following:
- External Stereo Sound Adapter
- (2) 1/4" Male to 1/8" Male TRS Stereo Audio Cable
- iRig 2 Guitar Interface Adaptor
- Apple Lightning to 3.5 mm Headphone Jack Adapter
Software
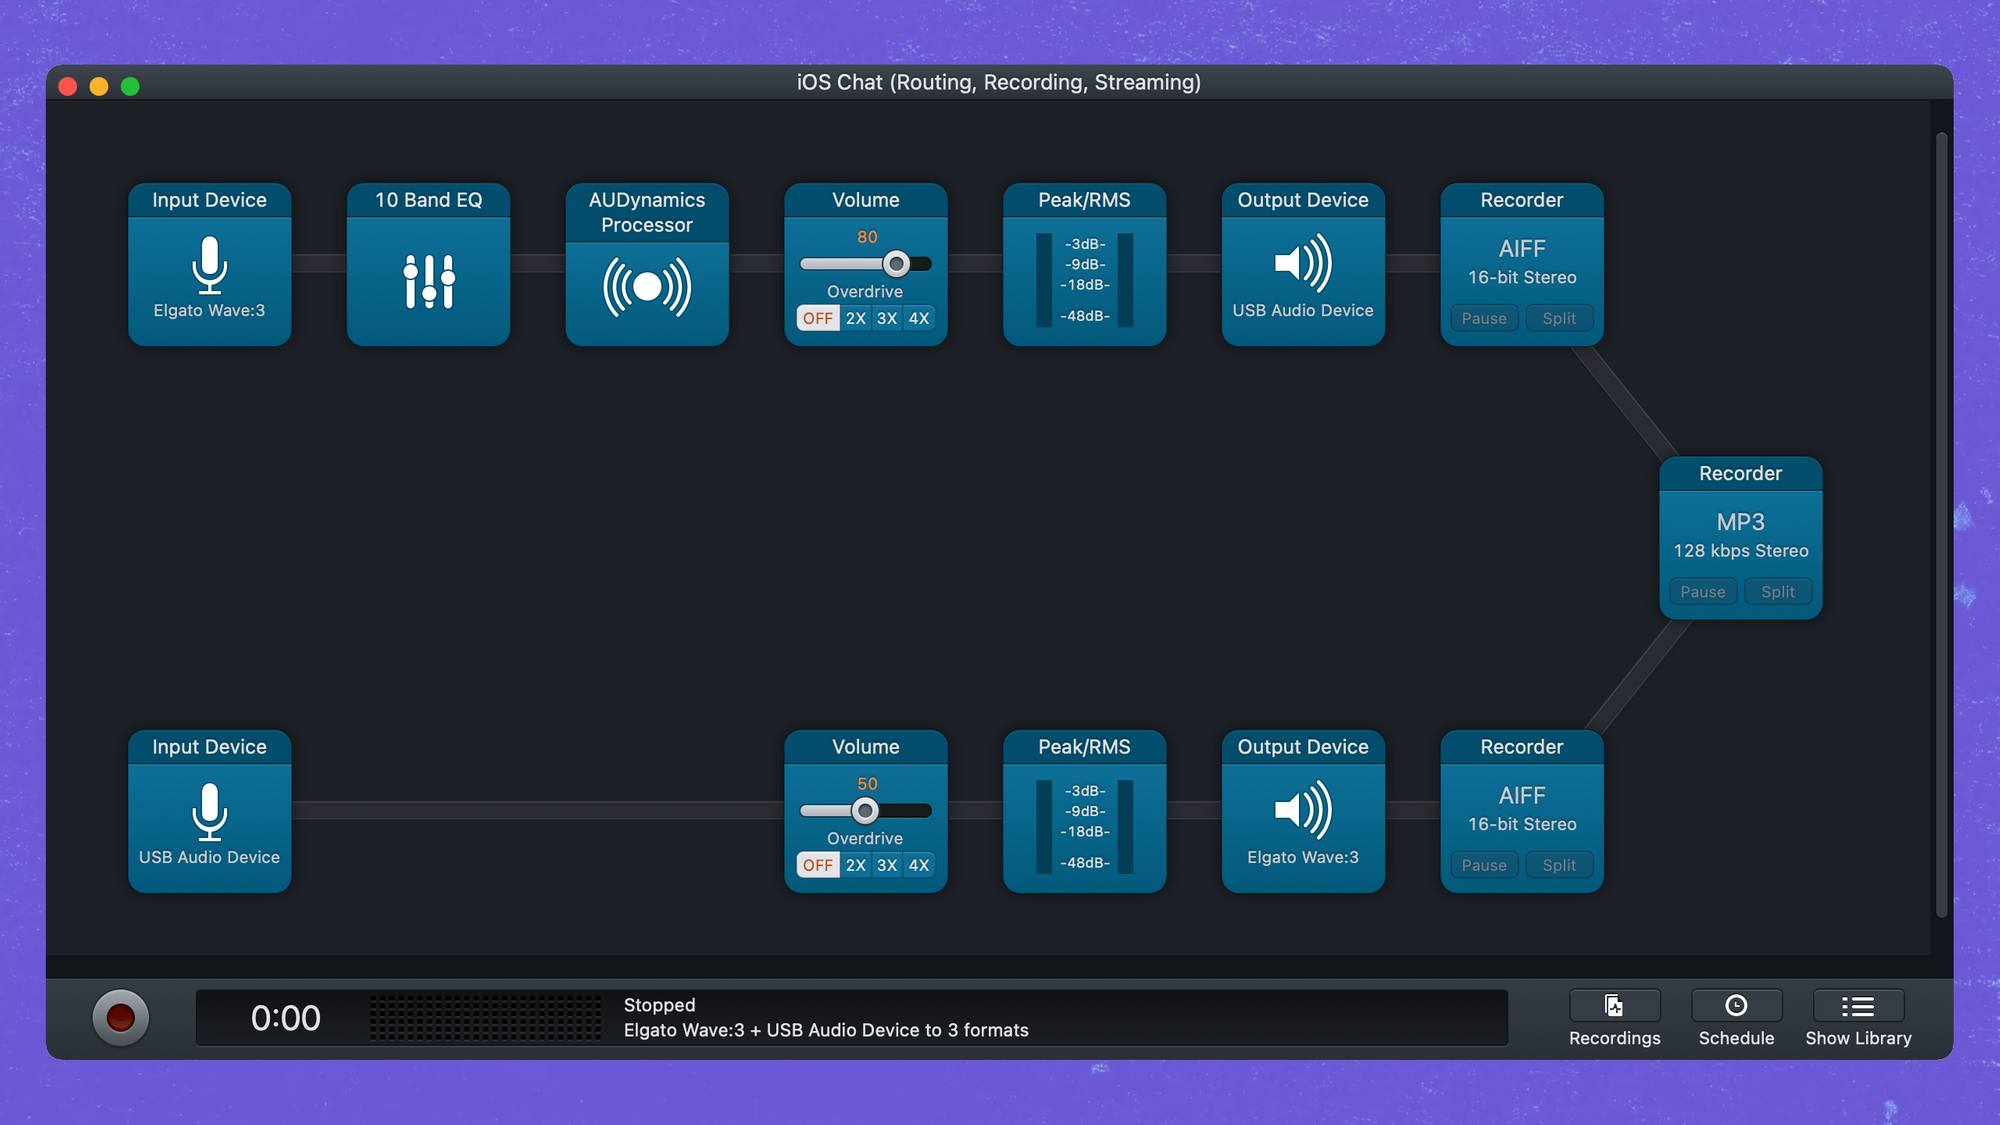
Next, we’ll need software to handle the role of a digital audio workspace. If you’re on a Mac, I recommend Rogue Amoeba’s Audio Hijack. This will let us:
- route the stage audio from your iOS device to your headphones
- apply EQ and processing to your microphone before routing it to your iPhone
- add any additional audio sources to the mix (browser audio, streaming music, or sound bites)
- record your microphone and the stage separately
- broadcast to an online radio server like Shoutcast
- live stream to a RTMP server like YouTube, Twitch, or Facebook
Setup
- Plug the iRig 2 into your iOS device using the Lightning adapter.
- Plug the first TRS cable into the 1/4" jack with the guitar icon on the iRig and the other end into the headphone jack in the sound adapter.
- Plug the second TRS cable into the the other 1/4" jack with the amplifier icon on the iRig and the other end into the microphone jack in the sound adapter.
- Plug the sound adapter into your computer.
- Connect your headphones to your computer or directly into your microphone.
- Connect your USB microphone to your computer.
- Start your session in Audio Hijack. (⌘+R)
- Join the conversation on your iOS device.
Conclusion
That's it! Hopefully, you now have a clear understanding of what it takes to upgrade your iOS audio setup.
Follow Along
Get the latest posts delivered right to your inbox